
“I Have No Idea What to Expect”
Your microblading appointment takes 2-3 hours: 45 minutes for brow mapping and design consultation, 20 minutes for numbing cream to take effect, then 60-90 minutes of actual microblading work with reapplication of topical anesthetic throughout. You’ll feel mild scratching during the session, can take bathroom breaks anytime, and walk out with immediately visible (though darker than final) brows.
You’ve seen the before and after photos.
You’ve read about the results.
You’ve heard it takes “2-3 hours.”
But what actually happens during those 2-3 hours?
Nobody tells you the detailed, minute-by-minute reality of what you’re signing up for. Here at Nirvana PMU in Shorewood, IL (serving the greater Chicagoland area), I believe in complete transparency.
So you’re left imagining:
- Will it be awkward?
- How much will it actually hurt?
- What if I need to use the bathroom?
- Will I just be lying there in pain the whole time?
- What if I don’t like it halfway through?
The unknown is scarier than the known.
So let me walk you through the entire process, hour by hour, minute by minute, exactly as it happens.
No glossing over the uncomfortable parts. No pretending it’s all butterflies and rainbows.
Just the honest, complete timeline of what your microblading appointment will actually be like.
Before You Arrive: What You Should Have Done
This isn’t part of the appointment, but it matters:
24-48 hours before:
- No alcohol (thins blood → more bleeding → worse results)
- No caffeine day-of (reduces numbing effectiveness, makes you jittery)
- No blood-thinning medications if possible (ask your doctor first)
- No retinol or chemical exfoliants on face for 1 week prior
- Don’t get your brows waxed or threaded for 1 week prior
The morning of:
- Eat a real meal (low blood sugar = worse experience)
- Drink water (stay hydrated)
- Wash your face (no makeup on brows)
- No caffeine (yes, I’m mentioning this twice - it matters)
- Wear comfortable clothes (you’ll be reclined for 2+ hours)
If you forget these, tell me when you arrive. We can adjust expectations or reschedule if needed.
Hour 1: Consultation, Mapping, and Design
Total time: 45-75 minutes
This is the longest part of the appointment, and the most important.
Minutes 0-10: Arrival and Paperwork
What happens:
- You arrive (hopefully 5-10 minutes early)
- Fill out consent forms and health questionnaire
- Review aftercare instructions preview
- Use the bathroom (do this now - you won’t want to interrupt later)
What you’re feeling:
- Probably nervous
- Maybe excited
- Possibly second-guessing everything
- Wondering if you should have had that coffee (no, you shouldn’t have)
What I’m doing:
- Reviewing your forms
- Checking for any medical contraindications
- Making sure you’re actually a good candidate
- Preparing the workspace
Pro tip: This is the time to mention if you’re on your period, if you’re anxious, if you didn’t follow the pre-care, or if you have any last-minute concerns. I’d rather know now than find out halfway through.
Minutes 10-25: The Consultation and Design Discussion
What happens:
We sit down face-to-face and talk about:
- What you hate about your current brows
- What you want them to look like
- What’s realistic for your face and hair
- Your lifestyle and maintenance preferences
- Your pain tolerance and concerns
- Any questions you have
I’ll ask you specific questions:
- “Show me brow photos you like” (most people have screenshots saved)
- “What bothers you most about your current brows?” (this tells me priorities)
- “How much makeup do you typically wear?” (natural vs. defined aesthetic)
- “What’s your pain tolerance like?” (so I know how much numbing we’ll need)
- “Do you have any upcoming events?” (timing considerations for healing)
What you’re feeling:
- More comfortable (we’re just talking)
- Hopefully more confident that I know what I’m doing
- Maybe some relief that we’re discussing your specific concerns
What I’m doing:
- Listening to what you say AND what you don’t say
- Looking at your brow bone structure and natural hair
- Mentally planning the shape that will work best
- Assessing your skin type (affects healing and retention)
- Making sure we’re on the same page about expectations
This conversation matters. If we’re not aligned here, we won’t be happy with the final result.
Minutes 25-60: Face Mapping and Shape Design
This is where it gets real.
What happens:
You recline in the treatment chair (like a comfortable dentist chair).
I clean your brow area with an alcohol wipe or gentle cleanser.
Then I start measuring and mapping your face.
The mapping process:
Using a combination of:
- String or measuring tools
- Brow mapping pencils
- Rulers and symmetry guides
- Mathematical proportions (golden ratio adjustments)
I map these points:
- Where each brow should start (aligned with inner corner of your eye and side of nose)
- Where the arch should peak (aligned with the outer edge of your iris or pupil, depending on your eye shape)
- Where each brow should end (diagonal line from nose to outer corner of eye)
- The width/thickness (based on your brow bone and desired look)
- Adjustments for your asymmetries (one eye higher, different bone structure, etc.)
What this feels like:
- Lots of marking on your face with pencil
- Frequent requests to “look straight ahead” or “look at this point on the ceiling”
- String being held across your face
- Me stepping back, staring at you, adjusting, stepping back again
- Possibly awkward small talk or comfortable silence (your choice)
What you’re feeling:
- A little weird (there’s a stranger measuring your face very precisely)
- Curious about what I’m doing
- Impatient to see what they’ll look like
- Maybe slightly uncomfortable from staying still
What I’m doing:
- Making tiny adjustments (moving a line 1mm can change everything)
- Checking symmetry from multiple angles
- Accounting for your bone structure, muscle pull, and natural asymmetries
- Obsessing over details (this is where the results are made)
Then I draw the shape:
Using a brow pencil, I draw the actual shape of your future brows.
This takes 10-20 minutes because I’m:
- Creating hair-like strokes in the direction I’ll microblade
- Showing you the density and coverage
- Adjusting the shape based on the mapping
- Making small refinements
Minutes 60-75: Shape Approval and Adjustments
What happens:
I hand you a mirror.
This is your moment to be honest.
What you should do:
- Look at them from multiple angles
- Stand up and look in a wall mirror at conversation distance
- Check them in different lighting if possible
- Be brutally honest if something feels off
Common requests:
- “Can we make the arch slightly higher?”
- “Can we make them a bit thicker in the front?”
- “The left one looks a tiny bit higher than the right”
- “Can we extend the tail just a little?”
All of this is normal and expected. This is the time to speak up.
What I’m doing:
- Making your requested adjustments
- Explaining why I might push back on certain requests (if they won’t suit your face)
- Redrawing sections as needed
- Checking and rechecking until you’re genuinely happy
I don’t proceed until you approve the shape.
Once you say “yes, I love them,” I’ll take a photo for reference (the drawing will partially come off during the session, so I need a guide).
What you’re feeling at this point:
- Probably excited (they look good!)
- Maybe nervous (okay, this is actually happening)
- Hopefully confident in the shape
This is the end of Hour 1. We haven’t started the actual microblading yet. If you need a bathroom break, take it now.
Hour 2: Numbing, Microblading First Pass, and More Numbing
Total time: 60-75 minutes
This is where the actual work begins.
Minutes 75-100: First Numbing Application
What happens:
I apply a thick layer of topical numbing cream to your entire brow area.
The numbing cream:
- Looks like thick white ointment
- Contains lidocaine (dental-style numbing agent)
- Sits on your skin for 20-30 minutes
- Feels cool, then slightly tingly, then nothing
What this feels like:
- Cool/cold initially
- Slightly tingly (like a slight minty sensation)
- After 10 minutes, you’ll notice the area feeling slightly numb
- After 20 minutes, noticeably numb (can’t feel touch as much)
What you’re doing during these 20-30 minutes:
Whatever you want:
- Listen to music or a podcast (bring headphones if you want)
- Chat with me (I’m prepping tools and we can talk)
- Meditate or do breathing exercises (helps with anxiety)
- Scroll your phone
- Close your eyes and relax
Most people:
- Start nervous
- Gradually relax as the numbing sets in
- Start to feel “okay, I think I can do this”
What I’m doing:
- Preparing pigments (custom-mixing your specific color)
- Sterilizing tools
- Setting up my microblade tools and pigment rings
- Checking your numbing progress every 5-10 minutes
Pro tip: Tell me if you’re feeling anxious. We can:
- Talk through it
- Do breathing exercises
- Add extra numbing time if needed
- Take a break
Minutes 100-105: Numbing Check and Prep
What happens:
I remove the numbing cream with a damp cloth.
I check if you’re numb by:
- Lightly touching the area
- Asking “can you feel this?”
- Testing sensitivity on different spots
If you’re not numb enough: We add more cream and wait longer. No rush.
If you’re good: We proceed.
I’ll wipe the area completely clean and do final prep.
What you’re feeling:
- The wiping sensation (but reduced because you’re numb)
- Nervous anticipation
- “Okay, here we go”
Minutes 105-150: First Pass Microblading
This is it. The actual microblading.
What happens:
You recline back, eyes closed.
I start creating hair-like strokes with the microblade tool.
The technique:
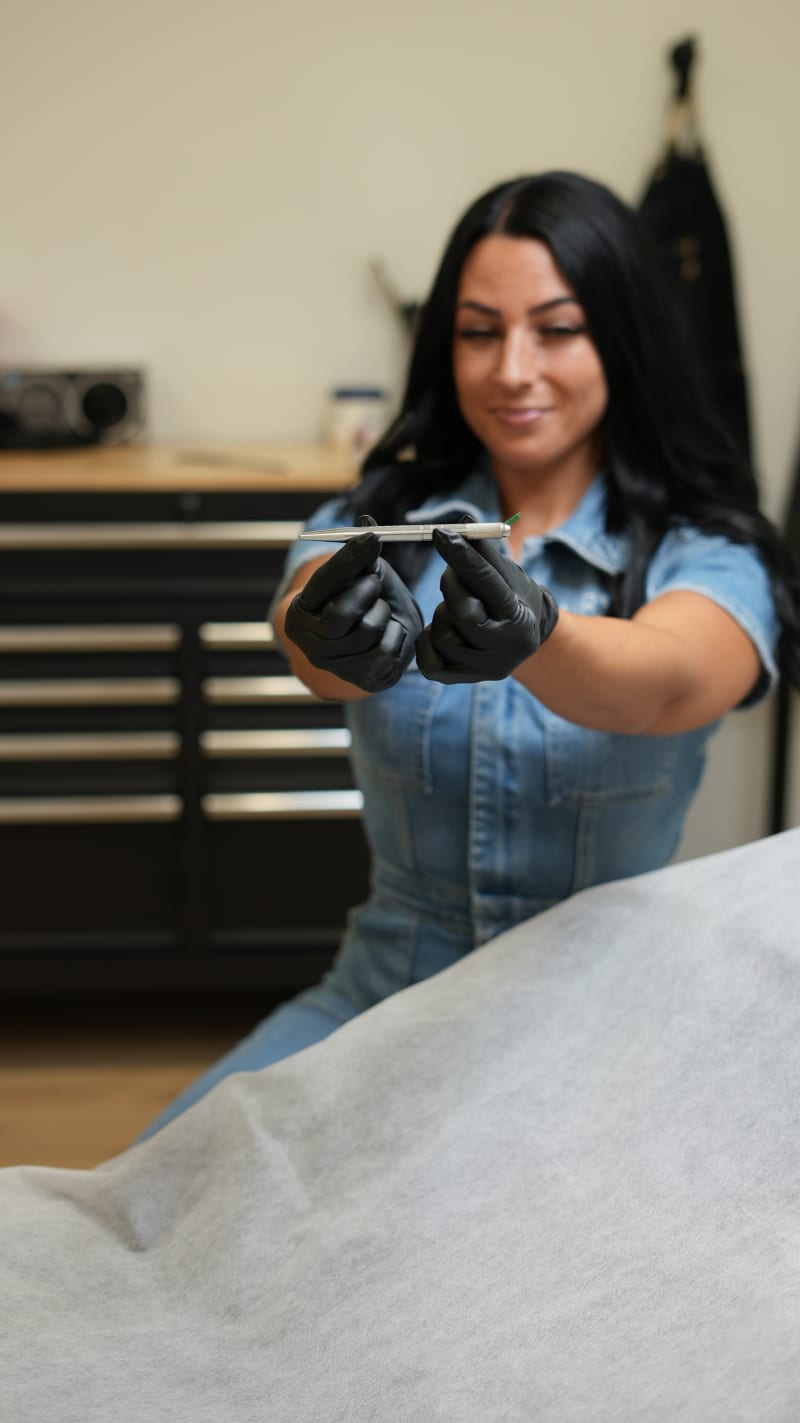
Using a handheld tool with ultra-fine needles arranged in a blade configuration:
- I make small, precise strokes
- Each stroke deposits pigment into the upper layers of skin
- Strokes follow the natural direction of your brow hair
- I work in sections (usually start with the tails, then body, then front)
What this feels like:
Honest description from clients:
- “Like someone scratching my skin”
- “Similar to eyebrow plucking, but continuous”
- “A scratchy, scraping sensation”
- “Uncomfortable but not unbearable”
- “Some areas hurt more than others”
The pain map:
Least painful: The tail (outer end) - most people rate this 2-3/10 Moderate: The body (middle) - most people rate this 3-4/10 Most painful: The arch and front - most people rate this 5-7/10
Why the variation:
- Different skin thickness
- Different nerve density
- Proximity to bone (more sensitive)
What you should do:
- Breathe (sounds cliche, actually helps)
- Tell me if a spot is particularly painful (I can add more numbing)
- Try to relax your face (tensing makes it worse)
- Distract yourself (music, counting, meditation, whatever works)
What I’m doing:
- Working as efficiently as possible (faster = less time in discomfort)
- Constantly checking in (“you okay?” “doing alright?”)
- Adjusting my pressure based on your feedback
- Applying secondary numbing gel as I work (more on this next)
The first pass takes 30-40 minutes.
I work in sections:
- Right tail: 8-10 minutes
- Right body and arch: 10-12 minutes
- Right front: 5-8 minutes
- Left tail: 8-10 minutes
- Left body and arch: 10-12 minutes
- Left front: 5-8 minutes
You can take breaks. If you need to pause, just say so.
Minutes 150-175: Secondary Numbing and Break
What happens:
After the first pass, I apply a secondary numbing gel.
This numbing gel is different:
- Applied directly to the fresh microblading (goes into the open skin)
- Works faster and more effectively than the cream
- Sits for 15-20 minutes
- Most clients say this is when they feel the most relief
What this feels like:
- The application might sting very slightly for 30 seconds (pigment and gel on fresh skin)
- Then a cooling, soothing sensation
- Within 5 minutes, noticeably more numb than before
- By 15 minutes, significantly more comfortable
What you’re doing:
- Resting
- Bathroom break if needed
- Checking your phone
- Drinking water (bring a bottle)
- Mentally preparing for the second pass (which is usually easier)
What I’m doing:
- Assessing the first pass
- Planning what needs more definition in the second pass
- Letting you rest
- Cleaning tools
What you’re feeling:
- Relief that the hardest part is over
- Probably proud of yourself for handling it
- Ready to finish this
This is the end of Hour 2. We’re about 60-70% done.
Hour 3: Second Pass, Perfecting, and Final Review
Total time: 45-60 minutes
The home stretch.
Minutes 175-215: Second Pass Microblading
What happens:
I remove the secondary numbing gel.
I assess the first pass and determine where I need to:
- Add more strokes for density
- Define the shape more clearly
- Fill in any gaps
- Darken certain areas
- Create additional dimension
Then I do a second pass.
What this feels like:
Most clients say the second pass is easier:
- You know what to expect now (less anxiety = less pain sensitivity)
- The secondary numbing is working better (skin absorbed it through the open channels)
- It’s faster (20-30 minutes vs. 40 minutes)
- You’re mentally prepared
Pain comparison:
- First pass without secondary numbing: 4-6/10 average
- Second pass with secondary numbing: 2-4/10 average
Some clients even say they barely feel the second pass.
What I’m doing:
- Working more quickly (I know your pain tolerance now, can adjust pace)
- Filling in areas that need more coverage
- Adding fine detail strokes
- Creating the final definition
- Constantly checking the reference photo to ensure I’m matching the approved shape
The second pass takes 20-30 minutes total.
Minutes 215-230: Pigment Sitting and Final Application
What happens:
I apply a final layer of pigment over the completed microblading.
This sits for 5-10 minutes to:
- Ensure maximum pigment absorption
- Fill in any remaining gaps
- Create even color saturation
What this feels like:
- Nothing (just pigment sitting on your skin)
- You can finally relax
- Almost done!
What you’re doing:
- Lying still so the pigment can absorb
- Probably feeling relieved
- Maybe checking the time and thinking “wow, that actually went by faster than I expected”
Minutes 230-245: Cleanup and First Look
What happens:
I gently remove all excess pigment with a damp cloth.
This is the first time you’ll see the actual results.
I hand you a mirror.
What you’ll see:
- Your brows will look DARK (this is normal and expected)
- They’ll look very defined (more dramatic than the final healed result)
- They might look “too much” (don’t panic - they’ll settle to 30-40% of this darkness)
- The skin around them will be red (also normal)
What I’ll tell you:
- “They will lighten significantly as they heal”
- “The color will settle to about 30-40% of this darkness in 4 weeks”
- “Don’t judge them today - judge them after healing”
- “The redness will be gone by tomorrow”
What you’re feeling:
- Probably a mix of excitement and “oh wow, they’re really dark”
- Relief that it’s done
- Proud of yourself for getting through it
- Curious about how they’ll look healed
What I’m doing:
- Cleaning up the area
- Taking “after” photos for my records and your reference
- Preparing your aftercare kit
Minutes 245-260: Aftercare Instructions and Checkout
What happens:
I go over aftercare in detail:
Days 1-7:
- Keep them dry (no water, no sweat, no steam)
- Gently blot with clean tissue if lymph fluid appears (first 24 hours)
- No touching with unwashed hands
- Apply aftercare ointment 2-3x daily (thin layer)
- Sleep on your back if possible
Days 7-14:
- They’ll start to flake/peel (DO NOT PICK)
- They’ll look lighter and patchy (normal - color returns)
- Continue aftercare ointment
- Still avoid water directly on them when possible
For 2 weeks, avoid:
- Swimming, hot tubs, saunas
- Direct sunlight, tanning
- Heavy workouts (excessive sweat)
- Makeup on the area
- Retinol, glycolic acid, AHAs on or near brows
- Sleeping on your face
I’ll give you:
- Written aftercare instructions
- Aftercare ointment
- My contact info for questions
- Touch-up appointment card (scheduled for 6-8 weeks out)
What you’re feeling:
- Information overload (it’s okay, you have written instructions)
- Excited to show people
- Maybe slightly overwhelmed by all the aftercare rules
- Ready to go home and rest
Final checkout:
- Payment (if not done beforehand)
- Scheduling your touch-up appointment
- Last-minute questions
And you’re done.
The Immediate Aftermath: First 24 Hours
Once you leave, the healing journey begins—and it’s helpful to know exactly what to expect each day. You can follow along with my Interactive Healing Timeline to see what’s normal at every stage.
What you’ll experience after leaving:
First 2-3 hours:
- Numbing wears off completely
- Area feels tender (like a mild sunburn)
- Slight throbbing possible (take ibuprofen if needed)
- They look VERY dark still
That evening:
- Tenderness continues but lessens
- You might see tiny amounts of lymph fluid (clear or slightly colored liquid) - blot gently
- Still very dark
- Skin around brows might be slightly puffy or red
Next morning:
- Tenderness mostly gone
- They still look very dark (this is normal)
- Possibly some slight flaking starting
- You’ll start to get used to seeing them
What Clients Wish They’d Known
After 3,500+ sessions over 10+ years, here’s what clients most commonly say they wish they’d known beforehand:
“I Wish I’d Known It Wasn’t As Bad As I Built It Up To Be”
The anticipation and anxiety were worse than the actual experience.
Most clients spend weeks worrying, then afterward say “that was totally manageable."
"I Wish I’d Known How Dark They’d Look Initially”
The darkness is shocking if you’re not prepared for it.
Knowing “they’ll settle to 30-40% of this initial darkness” helps, but seeing them that dark is still a bit startling.
Expect them to look too dark for the first week. That’s correct.
”I Wish I’d Eaten More Before”
Low blood sugar makes the whole experience worse.
If you show up hungry, you’ll feel shaky, lightheaded, and more sensitive to discomfort.
Eat a real meal 1-2 hours before your appointment.
”I Wish I’d Actually Avoided Caffeine”
Clients who had caffeine had a noticeably worse experience.
More jittery, more anxious, more painful, numbing didn’t work as well.
Skip the coffee. Just this once. It matters.
”I Wish I’d Brought Headphones”
Music or podcasts help the time go faster and provide distraction.
Some people like to chat, some prefer to zone out. Bring headphones if you’re the zone-out type.
”I Wish I’d Known I Could Ask For More Numbing”
You don’t have to suffer in silence.
If something hurts, say so. We can add more numbing, take a break, adjust technique.
”I Wish I’d Scheduled This Earlier”
Almost everyone says they wish they’d done it sooner.
Years of daily brow struggles, and they finally got microblading and thought “why did I wait so long?”
The Bottom Line Timeline
If you’re someone who needs the quick summary:
Hour 1 (45-75 min): Consultation, face mapping, shape design, approval
Hour 2 (60-75 min): First numbing, first pass microblading, secondary numbing
Hour 3 (45-60 min): Second pass microblading, pigment sitting, cleanup, aftercare instructions
Total time: 2.5-3.5 hours
Pain level: 3-6/10 average (varies by person and area)
Hardest part: First pass on the arch and front
Easiest part: Second pass with secondary numbing
Most awkward part: Face mapping (someone measuring your face closely)
Most relieving part: When the secondary numbing kicks in
Most shocking part: How dark they look initially
Overall consensus: “Totally manageable and worth it”
Ready to Experience It Yourself?
Now you know exactly what happens, minute by minute, hour by hour.
No surprises. No mysteries. Just the honest reality of what your appointment will be like.
If you’re ready to move forward with full knowledge of what to expect:
Book Your Microblading Appointment
Or if you still have questions about any part of the process:
You might also want to read about the truth about microblading pain, check if you’re a good candidate, or learn more about my microblading service and pricing.
During the consultation, you can:
- See the treatment room and tools
- Ask specific questions about your concerns
- Discuss your pain tolerance and numbing options
- See examples of the mapping and design process
- Get honest answers about whether you’re a good candidate
No pressure to book. Just come get your questions answered so you can make an informed decision.
Because you deserve to know exactly what you’re signing up for.
Clients come to my Shorewood studio from Plainfield, Bolingbrook, Romeoville, Naperville, Montgomery, and Yorkville. The drive is short, and I make the whole experience as comfortable as possible from the moment you walk in.
Questions about microblading or what to expect? Contact me - I’m happy to walk you through anything that’s unclear.


