The Core Principle: You’re Choosing for Week 6, Not Day 1
Microblading pigment selection doesn’t work like choosing a hair dye or matching a brow pencil. The color I apply during your session is not the color you’ll have in six weeks — it’s an educated calculation for what the healed result needs to be.
Pigment transforms as it heals. Skin cell turnover, the depth the pigment settles at, your skin’s undertone, and how oily or dry your skin is all affect the final color outcome. My job is to account for all of those variables before I make a single stroke.
Why Hair Color Isn’t the Starting Point
The most common misconception I hear from new clients is “I want it to match my hair exactly.” I understand the instinct — but hair color and skin pigment behave differently.
Hair gets its color from melanin distributed through the hair shaft. Microblading pigment sits in the dermis, filtered through living skin tissue. Skin has undertones — pink, yellow, olive, neutral — that interact with the pigment as it heals. A color that matches your hair precisely may heal with an unwanted cast once skin undertones influence it.
This is why I build a custom blend rather than pulling a standard “medium brown” off a shelf. The blend needs to:
- Match your natural brow hair color as a baseline
- Account for your skin undertone (warm, cool, or neutral)
- Compensate for how pigment shifts in your specific skin type
- Build in the expected lightening during healing

The Shift That Happens During Healing
Fresh microblading looks more saturated and slightly darker than the final result. Here’s what’s actually happening biologically:
Days 1-3: Pigment is sitting near the surface in the fresh channels. The color appears bold and slightly swollen. This is the darkest phase.
Days 4-10: Peeling begins. The outer layer of skin containing some of the surface pigment sheds. Strokes may appear patchy and uneven. Clients often panic during this phase — this is normal.
Days 10-14: The peeling completes. Brows look noticeably lighter than expected — sometimes dramatically so. The color has shifted from what it was on Day 1.
Week 6: The final healed color settles. Pigment has stabilized at the correct depth in the dermis. This is the result you booked for.
Understanding this timeline matters because it means you cannot judge color accuracy at any point before week 6. Darker-than-expected brows at Day 2? Normal. Lighter-than-expected brows at Day 12? Also normal. The true answer arrives at six weeks.
How Undertones Change Everything
Undertone is the single most important factor in microblading color selection that most clients have never thought about. Here’s what I mean in practical terms.
Every human skin tone has a base undertone — the underlying color cast beneath the surface. The three main categories:
Warm undertones (yellow, peach, golden): Common in fair to medium skin. Pigments placed in warm-undertone skin can amplify the warm base of the pigment. Without correction, this leads to brows that heal with an orange or red-gold tinge — especially visible in cooler lighting.
Cool undertones (pink, red, blue): Common in fair skin that burns easily and some deeper skin tones. Pigments in cool-undertone skin can pull bluer or more ashy than expected. A “natural brown” pigment in cool skin sometimes heals grayer than intended.
Neutral undertones: A mix of warm and cool with no strong direction. These skin types are actually the easiest to color-match because the pigment doesn’t pull hard in either direction.
The practical correction: if a client has warm undertones, I reduce the warm base of the pigment blend and add a cooler balance so the healed result reads as a clean, natural brown rather than orange-brown. If a client has cool undertones, I add warmth to offset what the skin will neutralize.
How Skin Tone Affects Healing
Beyond undertone, overall skin tone interacts with pigment depth and saturation. The Fitzpatrick scale — the standard classification for skin phototype — is a useful framework here.
Fitzpatrick I-II (very fair, burns easily): Pigment heals lighter and can look more transparent. I typically go slightly deeper in saturation at the initial session to account for how much the skin will lighten the pigment. Color corrections involving too-cool or too-warm tones are also more visible in fair skin because there’s less melanin to blend the pigment into.
Fitzpatrick III-IV (medium, tans moderately): The most forgiving skin type for color matching. Pigment heals with relatively predictable color shift, and natural warmth in the skin tone blends well with most brown pigment bases.
Fitzpatrick V-VI (dark to very dark): Pigment selection is more complex. Darker skin contains more melanin, which can mask subtle color variations — but can also make pigment appear to heal ashy or cool against the warmer tones of the skin. Deeper skin also has a higher risk of hyperpigmentation response to microblading, which means lighter initial pigment and careful technique are important.

Most Common Color Mistakes I See
After more than 3,500 sessions, I’ve seen every way microblading color can go wrong. The most common corrections I deal with:
Too warm / orange cast: Usually caused by using a pigment with a strong red or orange base without neutralizing for the client’s warm undertone. This is the most common color issue I see from work done elsewhere. It reads as unnatural — brows that look vaguely rusty or orange-tinged in natural light.
Too cool / gray/ashy: Pigment with a strong cool base, often deposited in skin that didn’t need the correction. Grayish or slate-toned brows that look almost bluish under certain lighting. More common in work done on clients with neutral or warm undertones using a pigment intended for very cool-toned skin.
Too dark overall: Pigment deposited too saturated for the client’s natural brow color or skin tone. This one often self-corrects somewhat during healing, but can result in a harsh, drawn-on look if the saturation was significantly off.
Inconsistent color across the brow: Usually a depth control issue rather than a color selection issue. When the brow body heals darker than the tail, or the front heals patchier than the arch, it signals the pigment wasn’t placed consistently during the session.
All of these are correctable — but correction takes multiple sessions. Choosing correctly upfront saves significant time, money, and stress. See microblading correction for what the correction process looks like.
Touch-Up Color Corrections
The 6-week touch-up is the right time to address any color issues that emerged during healing. This is part of why the touch-up is built into the initial cost — it’s not a formality, it’s quality control.
At the touch-up, if the healed color pulled too warm, I can layer a slightly cooler neutralizing pigment over the existing strokes to shift the tone without adding unwanted density. If it healed too cool, I add a warm-balanced layer.
What touch-up color correction can do:
- Shift a result that healed 1-2 tones off-target
- Add warmth to strokes that healed gray or ashy
- Cool down strokes that healed with an orange cast
- Deepen a result that healed lighter than intended
What it cannot do in one session:
- Fix a dramatically wrong color (multiple sessions needed)
- Remove pigment that was placed too dark or in the wrong location
The honest assessment of what’s achievable happens at the touch-up — not over the phone in advance. I can tell you what I’m working with once I see the healed result.
What I Assess Before Mixing
Before I blend pigment for a client, I evaluate:
- Natural brow hair color — the base we’re working from
- Hair shaft diameter and density — coarser brow hair needs slightly darker pigment to match at scale
- Skin undertone — visual assessment of the neck/inner wrist where tan doesn’t interfere
- Skin type — oily skin oxidizes certain pigments faster; dry skin retains color longer but may need lighter initial application
- Existing brow hair — if you have sparse natural hair, the microbladed strokes will be more visible than if they’re filling gaps, so the color relationship changes
- Sun exposure habits — UV breaks down certain pigment bases faster, which needs to be factored in for maintenance timing
What You See at the Consultation
During the design phase of your appointment, before any pigment is applied, I draw the brow shape on with pencil in a color close to the planned pigment. This gives you a preview of the shape and rough color range — not the exact healed result, but close enough to confirm direction.
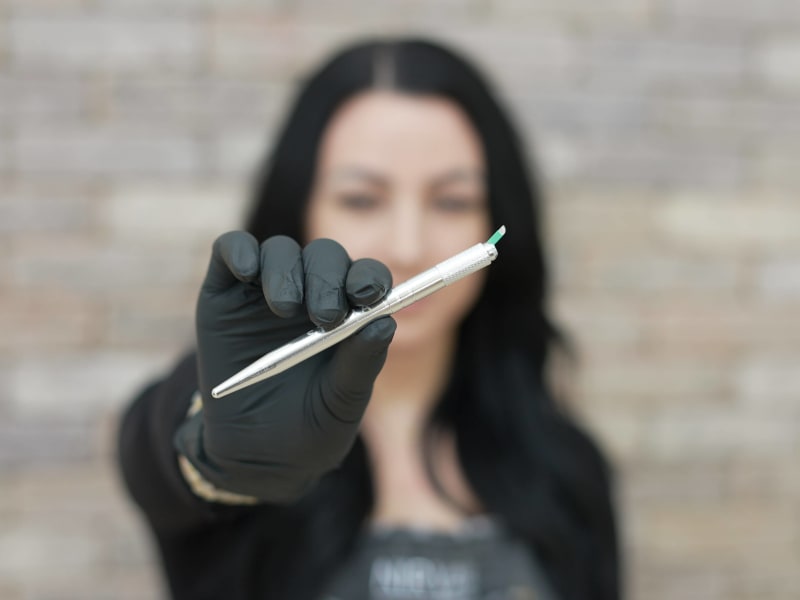
Once you’ve approved the shape, I mix the final pigment blend. The pigment I apply is specifically formulated for you — not off a shelf, not the same as the client before you.
If you have specific color concerns based on work you’ve seen (microblading that healed too red, too gray, or too saturated), bring those up before your appointment. That’s useful diagnostic information for how I adjust the blend.
Your consultation is free, and color matching questions are part of what I cover. Book at nirvanapmu.com/consultation or call (815) 302-7673.
Why I Never Use “Off the Shelf” Color
At consultations, I sometimes hear people say their previous artist just picked a color from a chart and got to work. That tells me the color selection process wasn’t thorough — and it often explains why the result didn’t match expectations.
I blend every pigment fresh for the client in front of me. My pigment inventory contains multiple base colors in warm, cool, and neutral ranges, plus correcting tones I use to offset what I know the client’s skin will do during healing. The final mix is a combination designed specifically for one person’s skin on that day.
This takes more time. It means I’m standing at the mixing tray for several minutes before I’ve made any strokes. Clients who’ve been to studios where the prep was faster may wonder what I’m doing — but that time is exactly what the quality of the healed result depends on.
Color at the Annual Refresher
At annual refresher appointments, color selection goes through the same evaluation — but with the advantage that I can see what the original pigment did in your skin.
The healed color from your initial session is a direct data point. If it pulled slightly warm over 12 months, I adjust the blend to be more neutral at the refresher. If the color held perfectly and just needs a refresh of saturation, I use a very similar formulation and simply rebuild density.
This is one reason consistent appointments with the same artist tend to produce better long-term results than switching — the artist who did your initial session has a baseline data set for your skin’s behavior that a new artist doesn’t have.
Questions to Ask About Color at Your Consultation
If you’re booking microblading for the first time and want to make sure color is handled well, ask your artist:
- Do you custom-blend pigment for each client, or use pre-mixed colors?
- How do you account for healing shift when selecting pigment?
- Have you worked with my skin tone/undertone before?
- Can I see healed photos of clients with similar coloring?
The answers tell you whether color selection is being taken seriously or treated as an afterthought.
What Happens When Color Goes Wrong
Color mistakes happen when pigment selection skips one of the variables — skin undertone, healing shift, or skin type. The result shows up at the 6-week healed mark, not on the day of your appointment.
The most common correction I see: brows that healed with a grayish or ashy tone. This happens when a cool-based pigment is used on someone with neutral or warm undertones, or when pigment is placed slightly too deep and the cooler base of the color becomes more prominent as it settles. The fix is layering a warm-balanced correcting pigment — done at the touch-up if the shift is minor, over multiple sessions if it’s significant.
The second most common: an orange or reddish cast. This happens when a warm-heavy pigment is placed in warm-undertone skin without neutralizing. Both mistakes are preventable with proper upfront assessment.
Why the Touch-Up Is the Color Check
At 6 weeks, I see the true healed result for the first time. The pigment has settled, all swelling is gone, and the color is stable. This is when I can evaluate whether the shade landed where I intended.
If the color is off — even by a shade — the touch-up is when I correct it. A slight warm shift gets a cooler overlay. A slightly ashy result gets a warmer layer added. These corrections are subtle at this stage, which is exactly why doing them at 6 weeks is more effective than waiting until the annual refresher when the pigment base has thinned further.
Clients sometimes ask whether they can just wait until the annual refresher to address a minor color issue. The answer is: the correction is easier now. Color layering works better over a richer pigment base. Six weeks is the right time.
The Most Important Thing I Can Tell You About Color
Most microblading color problems are preventable. They stem from one of two sources: using a pre-mixed pigment without assessing the individual client, or not accounting for how the color will shift as it heals.
When you see microblading that healed orange, gray, or just “off” — that’s almost always a color selection failure, not a healing failure. The skin did exactly what skin does. The artist didn’t account for it.
At Nirvana PMU, color mixing happens fresh for every client at every appointment. I’m not pulling a chart and picking the closest match. I’m blending specifically for you — your undertone, your skin type, your existing brow hair color — and targeting the healed result, not the Day 1 result.
That’s what 3,500+ sessions looks like in practice. Not speed. Not volume. Attention to the details that actually determine whether you love the result six weeks later.
If you’ve had microblading before that healed with an off color — too warm, too gray, or inconsistent — bring photos to your consultation. Even photos taken on your phone in natural light are useful; what I’m looking at is the color temperature and how the undertone reads, not high-resolution detail. That history is useful information for how I approach your pigment blend. A bad color result from a previous session tells me something specific about how your skin processes pigment, and I can use that to do better.
See related: microblading color correction and what to expect — if the color issue from previous work is significant, that post explains what correction actually involves and how many sessions to realistically expect.
For pricing and consultations: book online or call (815) 302-7673. New clients from Naperville, Joliet, and the surrounding Chicago suburbs are welcome — the consultation is free and includes a full color assessment before any work is scheduled.
Studio: 805 W Jefferson St Ste I, Shorewood, IL 60404
For clients who’ve already had work done elsewhere and are dealing with a color issue — the microblading correction guide explains what the fix process actually looks like and how many sessions to realistically expect depending on severity.
Color matching is one of those things that looks simple from the outside and is genuinely complex in practice. The artists who get it right consistently aren’t guessing — they’ve done the work to understand how skin processes pigment and built a system for accounting for it. That’s what 3,500+ sessions worth of color experience looks like.