

How Long Does a Microblading Appointment Take?
Ninety minutes. Your first microblading session is a single 90-minute block that covers consultation, brow mapping, numbing, both passes of hair strokes, and your aftercare walkthrough. It holds to that block because the shape is decided by measurement, not negotiated on your face — so nothing has to be redrawn.
You’ve seen the before and after photos. You’ve read about the results. What nobody tells you is the ordinary, minute-to-minute reality of the room: what I’m actually doing, what you’re actually feeling, and when.
So you’re left imagining the worst version of it. Will it be awkward? How much will it hurt? What if I need the bathroom? What if I don’t like it halfway through?
The unknown is always scarier than the known. Here at Nirvana PMU in Shorewood, IL — serving the greater Chicagoland area — I’d rather you walked in already knowing. So let me take you through the whole thing in order, including the uncomfortable parts.
What Should You Do Before Your Microblading Appointment?
Preparation starts 24-48 hours before you arrive. No alcohol, no caffeine the morning of, no retinol for a week, and eat a real meal beforehand. These steps directly affect your comfort level, how well the numbing works, and how your skin holds pigment. Skipping prep means a harder session and potentially worse results.
24-48 hours before:
- No alcohol (thins blood → more bleeding → worse results)
- No caffeine day-of (reduces numbing effectiveness, makes you jittery)
- No blood-thinning medications if possible (ask your doctor first)
- No retinol or chemical exfoliants on face for 1 week prior
- Don’t get your brows waxed or threaded for 1 week prior
The morning of:
- Eat a real meal (low blood sugar = worse experience)
- Drink water (stay hydrated)
- Wash your face (no makeup on brows)
- No caffeine (yes, I’m mentioning this twice — it matters)
- Wear comfortable clothes (you’ll be reclined for most of the session)
If you forget one of these, tell me when you arrive. I can adjust the plan for that day, or reschedule if that’s genuinely the better call.
What Happens First: Paperwork, Then the Real Conversation
Nothing sharp happens for a while. The opening stretch of your appointment is forms, then a face-to-face conversation about your brows — and that conversation is doing more work than it looks like it is.
Check-in and paperwork
You arrive, fill out consent forms and a health questionnaire, and use the bathroom (do this now — you won’t want to interrupt later). Meanwhile I’m reading your forms, checking for medical contraindications, confirming you’re actually a good candidate, and setting up.
This is the moment to mention if you’re on your period, if you’re anxious, if you didn’t follow the pre-care, or if something’s been bothering you that you haven’t said out loud yet. I’d much rather know now than find out halfway through.
The consultation
Then you and I sit down and talk. What you hate about your current brows. What you want them to look like. What’s realistic for your face and your existing hair. How much makeup you actually wear day to day. Whether you have an event coming up that changes the timing.
I’ll ask you to show me brow photos you’ve saved — almost everyone has screenshots — and I’ll ask what bothers you most, because that tells me your priorities in a way “I want them fuller” doesn’t.
While you’re talking, I’m listening to what you say and to what you don’t. I’m looking at your brow bone, your natural hair direction, your skin. I’m already building the shape in my head. Most people relax during this part, because by then it’s just a conversation.
If you and I aren’t aligned here, you won’t be happy with the result — and neither will I. So this part isn’t small talk.
How I Map Your Brows — and Why I Never Use a Stencil
Mapping is where the result is actually made. I spend roughly 80% of the session on shape and 20% on color, because the right shape changes everything and the wrong shape can’t be rescued by a nice pigment.
You recline in the treatment chair — it’s a comfortable version of a dentist chair — and I clean the brow area. Then I start measuring.
I mark six reference points on your face, and every one of them comes off your own bone structure:
- Where each brow should start, aligned with the inner corner of your eye
- Where the arch should peak, aligned with the outer edge of your iris
- Where each brow should end, on the diagonal from your nose to the outer corner of your eye
- The width through the body, based on your brow bone and the look you asked for
- The adjustments for your asymmetries — one eye sits higher, one bone is heavier, that’s everyone
- The stroke direction I’ll follow, mapped to how your existing hair actually grows
What this feels like from your side: a lot of pencil marks, a lot of “look straight ahead,” a string held across your face, and me stepping back, staring at you, adjusting, and stepping back again. It’s a little strange having someone measure your face this precisely. It’s also the part that decides whether you like these brows in two years.
I hate stencils. Everyone has different bone structure, and nobody is symmetrical — a stencil sized for one face can’t work on the next one, so you end up adjusting it on the skin until it looks passable. That’s guessing with extra steps. Learn the measurements, learn what suits a face, and you can map brows for anybody.
This is also the honest answer to why other appointments run so much longer than mine. It’s almost never the technique. It’s one of three things: treating each set of brows as a fresh creative act instead of a proven process, working from a template and then negotiating it on the face, or handing the shape decision to the client and redrawing until she agrees. Every one of those turns a decision into a loop. None of them makes the artist careless — plenty of skilled people work that way. It just means the session has nowhere to end.
Then I draw the shape itself in pencil, with strokes running in the direction I’ll microblade, so you’re seeing a preview rather than an outline.
The mirror, and your actual veto
I hand you a mirror. This is the moment to be honest with me.
Look at them from a few angles. Stand up and check them in a wall mirror at conversation distance, not nose-to-glass. If something feels off, say so. The requests I hear constantly — can the arch come up slightly, can they be a bit thicker in the front, the left one looks higher, can you extend the tail — are all normal, and I’d rather hear them now.
Some clients apologize for being particular. Don’t. This is your face. I want you to love your eyebrows just as much as I do, so if there’s something you aren’t a hundred percent comfortable with, tell me and let’s fix it together.
I’ll push back if a request genuinely won’t suit your face, and I’ll tell you why. But I don’t pick up a tool until you approve the shape. Once you say yes, I photograph the drawing for reference, because part of it wears off during the session and I need the guide.
Does Microblading Hurt During the Actual Procedure?
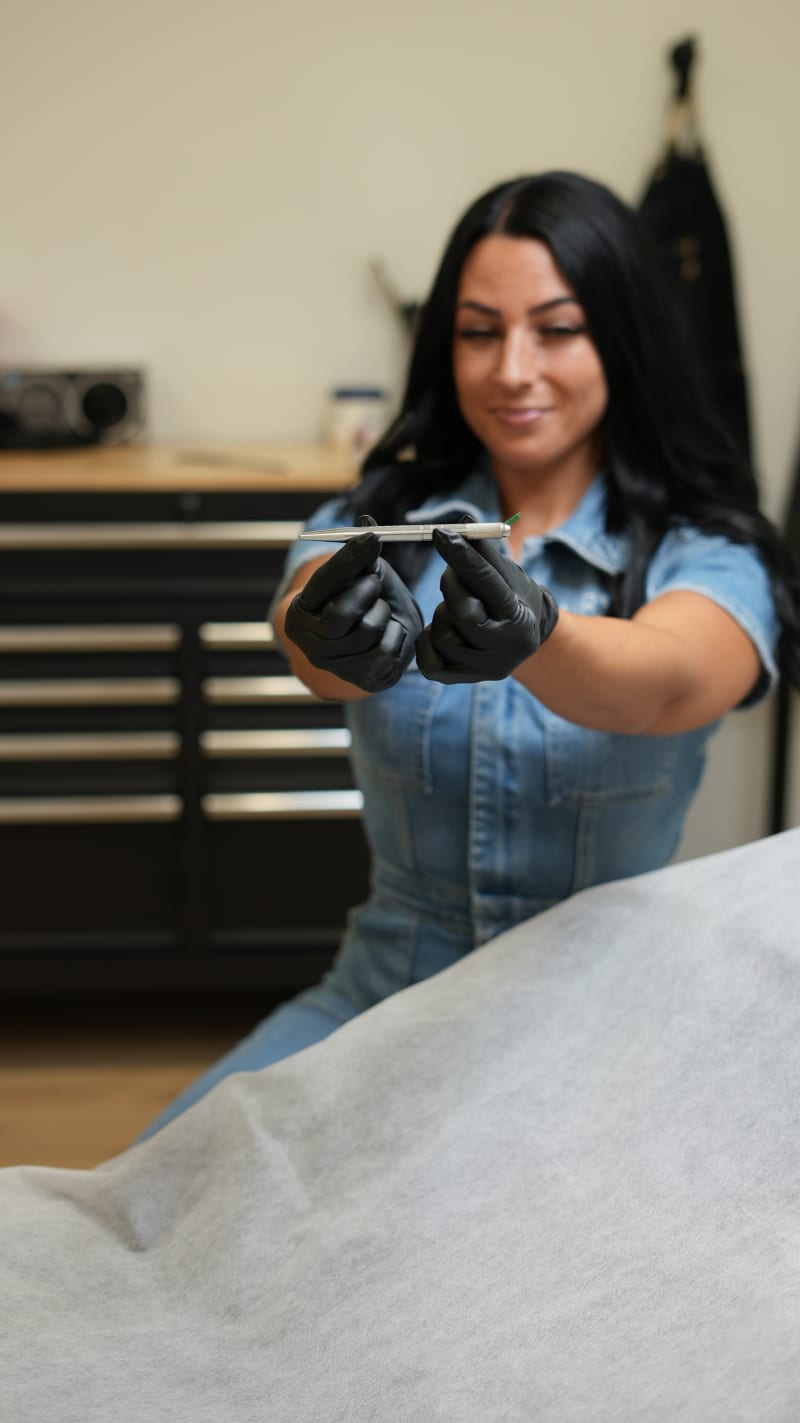
Most clients rate the sensation at 3-6 out of 10 — mild scratching, not sharp pain. I apply a lidocaine-based cream before I start, then a stronger gel directly into the skin after the first pass, which is when most people say the real relief kicks in.
Numbing, and what I’m doing while it works
I apply a thick layer of numbing cream over the whole brow area. It looks like white ointment, feels cool, then slightly tingly like a mint sensation, then like nothing at all.
That waiting time isn’t dead time on my end — it’s when I custom-mix your pigment. I’m blending for how the color will look healed, not how it looks the day you leave, which is a different target than most people expect. Your side of it is genuinely free: headphones, a podcast, your phone, breathing exercises, or a conversation with me while I prep tools.
Tell me if you’re anxious rather than sitting with it. I can talk you through it, give the numbing longer, or slow down. None of that costs you anything.
Before I start, I wipe the cream off and test whether you’re actually numb — light touches in a few different spots, asking whether you can feel them. If you’re not numb enough, more cream goes on and I give it longer. That is not a delay to be pushed through.
The first pass
You lie back, eyes closed, and I start laying in hair strokes with a manual tool — ultra-fine needles arranged in a row, no machine. Each stroke deposits pigment into the upper layers of skin, following the direction your own hair grows. I work in sections, and I work in the same order every time: right tail, right body and arch, right front, then the same three on the left.
Clients describe the feeling in remarkably consistent language. Someone scratching my skin. Like plucking, but continuous. Scratchy. Uncomfortable but not unbearable. Some spots worse than others.
There’s a rough map to that variation:
- Least sensitive: the tail, at the outer end — most people rate it 2-3/10
- Moderate: the body, through the middle — usually 3-4/10
- Most sensitive: the arch and the front — usually 5-7/10
It’s skin thickness, nerve density, and how close the tool is to bone. Nothing has gone wrong when the front stings more.
While I’m working, I’m listening as much as I’m looking. There’s a faint tearing sound the tool makes at the correct depth — I call it the velcro sound, and it’s how I check by ear that I’m in the basal layer of the epidermis, roughly 0.08 to 0.15mm down. No sound means I’m too shallow and the pigment won’t hold. Excessive bleeding means I’m too deep. That sound is the reason the strokes are still crisp a year later instead of blurring out.
Your job is small: breathe, keep your face loose (tensing makes it worse), and tell me if a spot is genuinely painful so I can add numbing. You can ask me to pause at any point.
Secondary numbing
After the first pass, I apply a different numbing gel — this one goes directly onto the fresh strokes, into open skin, which is why it works better and takes hold sooner than the cream did.
It might sting faintly for the first few seconds. Then it goes cool and soothing, and you’ll notice the difference well before I pick the tool back up.
This is a real break. Rest, check your phone, drink some water, go to the bathroom. I’m assessing the first pass and deciding where the second one needs to go. Most people are surprised at this point that the hard part is already behind them.
The Detail Pass, the First Look, and Going Home
The rest of the session is refinement rather than construction. I’m not building a pattern anymore — I’m reading the one that’s there and deciding where it needs more.
The detail pass
I remove the gel and go back over the brows: adding strokes where the density is thin, sharpening the shape, closing gaps, deepening certain areas, and building a bit more dimension.
Almost everyone finds this pass easier. You know what to expect, so your anxiety isn’t amplifying the sensation. The secondary numbing has soaked in through the open channels and is working properly. And I’m refining strokes that already exist rather than deciding anything new, checking the reference photo constantly to make sure I’m matching the shape you approved.
The numbers people give me bear that out — the first pass tends to land around 4-6/10, the detail pass around 2-4/10. A fair number of clients tell me they barely felt the second one.
Then a final layer of pigment sits on the finished work while it absorbs, and that part feels like nothing at all.
The mirror, for real this time
I wipe away the excess pigment, and you see the actual result for the first time.
Here’s the part I always say before I hand over the mirror, because there’s a method to my madness: they’re going to look dark. Darker than you expected, more defined than the final result, possibly like too much. The skin around them will be red. All of that is exactly right.
They’ll lighten dramatically as they heal. The color settles to around 30-40% of what you’re looking at, over about four weeks. Don’t judge them today — judge them once they’ve healed. The redness is gone by tomorrow.
If you want the full map of what happens between now and then, my guide to the four microblading healing stages walks through each one, and you can follow along in real time with the Interactive Healing Timeline.
Then I take reference photos under a bright ring light, which is when I usually tell clients: now that I’ve spent all this time making tiny little slices on your forehead, I’m going to blind you before you leave. It gets a laugh, their shoulders drop, and the photo stops looking like a mugshot.
Aftercare, and the appointment you’ll book next
Before you go, I walk you through aftercare properly, and you leave with it in writing:
Days 1-7
- Keep them dry — no water, no sweat, no steam
- Gently blot with clean tissue if lymph fluid appears (first 24 hours)
- Don’t touch them with unwashed hands
- Apply a thin layer of aftercare ointment 2-3 times daily
- Sleep on your back if you can
Days 7-14
- They’ll flake and peel — do not pick
- They’ll look lighter and patchy; the color comes back
- Keep up the ointment
- Still keep water off them where you can
For two weeks, avoid: swimming, hot tubs, saunas, direct sun, tanning, heavy sweating, makeup on the area, retinol or acids anywhere near the brows, and sleeping face-down.
You’ll leave with written instructions, aftercare ointment, my contact information, and your touch-up booked for 6-8 weeks out. That touch-up is a separate $150 appointment, not part of the $650 first session — and it’s not a repair. Microblading is like painting a wall: the first session is the foundation coat, and the touch-up is the second coat that fills in wherever the first one healed unevenly, so the whole thing reads as one even coat. It was always going to take two.
Then payment, scheduling, any last questions, and you’re done. All of it inside the same 90-minute block.
What Happens in the First 24 Hours After You Leave
Healing starts the moment you walk out the door, and the first day has its own rhythm.
The first few hours after you leave: the numbing wears off completely and the area feels tender, like a mild sunburn. Some people get a faint throb; ibuprofen handles it. They still look very dark.
That evening: the tenderness eases. You might see small amounts of lymph fluid — clear or slightly tinted — which you blot gently. The skin around the brows may look a little puffy or pink. Still dark.
The next morning: the tenderness is mostly gone, they still look dark, you may see the first hints of flaking, and you’re starting to get used to the face in the mirror.
What Do Clients Wish They’d Known Beforehand?
After 3,500+ treatments over 10+ years, the same handful of things come up again and again. The biggest one by a wide margin: the anticipation was worse than the appointment.
“I wish I’d known it wasn’t as bad as I built it up to be.” People spend weeks worrying and then describe it afterward as totally manageable. That gap between the dread and the reality is the single most consistent thing clients report.
“I wish I’d known how dark they’d look.” Knowing the number — they settle to 30-40% of that initial darkness — helps. Seeing it is still startling. Expect them to look like too much for the first week. That’s correct.
“I wish I’d eaten more before.” Show up hungry and you’ll feel shaky, lightheaded, and noticeably more sensitive to discomfort. Eat a real meal an hour or two before.
“I wish I’d actually skipped the caffeine.” The clients who had coffee are more jittery, more anxious, and their numbing doesn’t work as well. It’s a real difference, not a superstition.
“I wish I’d brought headphones.” Some people like to chat the whole way through; some want to disappear into a podcast. If you’re the second kind, bring them.
“I wish I’d known I could ask for more numbing.” You don’t have to be brave about it. If something hurts, say so — I can add numbing, pause, or change my angle.
“I wish I’d scheduled it sooner.” Years of the same morning routine, and then almost everyone says some version of why did I wait so long?
The Short Version
If you just want the sequence:
- Forms and conversation — health screening, what you want, what’s realistic for your face
- Mapping and design — six reference points off your bone structure, shape drawn, mirror handed over, your approval required
- Numbing — cream goes on; I mix your color for how it heals while it takes hold
- First pass — hair strokes with a manual tool, section by section
- Secondary numbing and detail pass — stronger gel, then density and refinement
- First look, photos, aftercare — mirror, reference photos, day-by-day instructions, touch-up booked
Total: one 90-minute block.
Typical discomfort: 3-6/10, varying by area. Hardest part: the first pass across the arch and front. Easiest part: the detail pass, once the secondary numbing is working. Strangest part: having someone measure your face that closely. Best part: the moment the secondary numbing kicks in — or the mirror, depending on who you ask.
Ready to Book?
Now you know the sequence, what each part feels like, and what you’re actually agreeing to. No surprises left in it.
Book Your Microblading Appointment
If you’d rather meet me first, that’s a real option too — schedule a free consultation and you can see the treatment room and the tools, ask about your specific concerns, watch how the mapping works, and get an honest answer about whether you’re a good candidate. There’s no pressure to book anything at the end of it.
You might also want to read the truth about microblading pain, check whether you’re a good candidate, or look at my microblading service and pricing.
Clients come to my Shorewood studio from Plainfield, Bolingbrook, Romeoville, Naperville, Montgomery, and Yorkville. The drive is short, and I make the whole experience as comfortable as I can from the moment you walk in.
Questions about microblading or what to expect? Contact me — I’m happy to walk you through anything that’s unclear.


