How to Prepare for Microblading
Proper microblading preparation means stopping retinol and vitamin A products two weeks out, avoiding sun exposure and tanning one week out, skipping blood thinners (alcohol, aspirin, ibuprofen, fish oil, vitamin E) in the 48 hours before, and arriving clean with no brow makeup. These steps directly affect how cleanly pigment deposits and how well color retains.
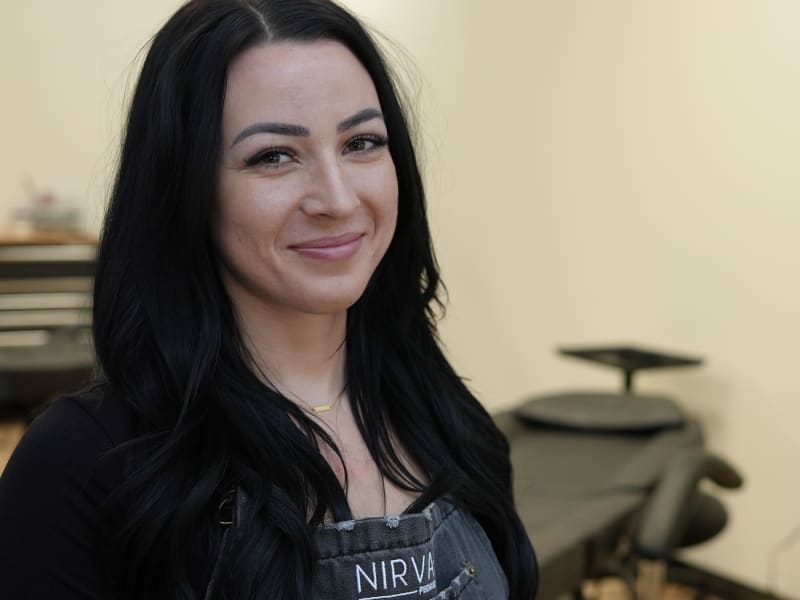
First-time clients ask me this question constantly, and I love it. Asking how to prepare means you’re serious about getting the best result possible. And preparation matters more than most people realize.
Over 10+ years and 3,500+ clients, I’ve seen the difference between clients who follow prep instructions and clients who don’t. It shows up in how cleanly the pigment deposits, how much the strokes bleed or blur, how well color saturates, and how evenly the whole thing heals.
None of this prep is complicated. But it has to actually happen.
2 Weeks Before Your Appointment
Stop Retinol and Vitamin A Products
This is the one that catches the most people off guard.
If you use retinol, tretinoin, Retin-A, or any product with vitamin A — including prescription retinoids — stop using them on your face at least two weeks before your microblading appointment.
Here’s why: retinol thins the stratum corneum (the outer layer of your skin). It speeds up cell turnover, which sounds great for your skincare routine, but it’s problematic for microblading. Thinned skin doesn’t hold pigment the same way. The strokes can blur. Pigment can push out before it has a chance to bond with the deeper layers. Your healed result may be uneven or patchy in ways that wouldn’t have happened otherwise.
Two weeks is the minimum. Some dermatologists recommend stopping three weeks out if you’re on a prescription-strength retinoid.
Avoid Chemical Exfoliants Near the Brow Area
Same logic applies to glycolic acid, salicylic acid, lactic acid, and AHA/BHA products. You don’t have to stop your entire skincare routine — just avoid applying these products near the brows for the two weeks leading up to your appointment.
No Botox or Fillers Near the Brows
If you get Botox or fillers in the forehead or around the eyes, schedule them no sooner than two weeks before your microblading appointment. Freshly injected areas can shift during healing, and I need your facial muscle positioning to be stable when I’m mapping your brow shape.
1 Week Before Your Appointment
Protect Your Skin From Sun Exposure
No tanning beds the week before your appointment. No prolonged sun exposure that could result in a tan or sunburn in the brow area.
Sunburned or recently tanned skin changes the surface texture and pigmentation of your brows, which makes it harder to accurately assess your natural skin tone for color selection. More importantly, sunburned skin simply cannot be safely treated — I won’t microbladed over burned or peeling skin, and I’ll ask you to reschedule if it’s an issue.
If you’re heading somewhere sunny in the week before your appointment, be diligent about sun protection on your face.
Be Careful with Brow Grooming
If you wax, thread, or tweeze your brows, try to do it at least a week before your appointment. Freshly waxed skin can be more sensitive and occasionally more reactive. Tweezing right before can cause minor irritation or swelling at individual follicle sites that I’d rather not be dealing with during the session.
Light trimming or brushing is fine. Just give the skin a little time to settle after any wax.
Week-Before Countdown: What to Actually Do Each Day
The two-week prep window can feel abstract. Here’s a day-by-day breakdown for the final week so nothing slips:
Day 7 (one week out): Do any brow waxing, threading, or tweezing today — this is the last day I recommend for brow grooming before your appointment. The skin needs a week to fully settle.
Day 6: Double-check that you’ve stopped retinol and chemical exfoliants near the brows. If you missed the two-week window, stop now — even a few extra days without these products makes a meaningful difference.
Day 5: If you have an active cold sore, notify me now — not the day before. If you’re prone to cold sores and the appointment area overlaps with common outbreak sites, I’ll want to discuss whether prophylactic antiviral treatment is appropriate.
Day 4: Confirm you’re not taking any NSAIDs (ibuprofen, naproxen, aspirin) for any chronic condition. If you are, this is when to check with your prescribing doctor about a brief pause — not the night before.
Day 3: This is when to stop ibuprofen, aspirin, and naproxen if you’ve taken any. Also stop fish oil and vitamin E from this point forward.
Day 2 (48 hours out): No alcohol from this point. Lay out your aftercare supplies so they’re ready when you get home — you won’t want to make a pharmacy run afterward.
Day 1 (night before): No alcohol. Eat a real dinner. Get good sleep — the appointment itself is low-stress, but you’ll be more comfortable well-rested. Do not apply any retinol, AHA, or strong active products to your face tonight.
Morning of: No caffeine if you can avoid it. Eat a full breakfast. Arrive with a bare face — foundation elsewhere is fine, but nothing near the brows.
48 Hours Before Your Appointment
Skip Blood Thinners
This list surprises people because most of these things seem innocuous:
- Alcohol — yes, including wine the night before
- Aspirin and ibuprofen (Advil, Motrin)
- Fish oil supplements
- Vitamin E supplements
- St. John’s Wort
All of these thin the blood to varying degrees. More bleeding during the session means the pigment gets diluted and flushed out of the fresh strokes before it can bond with the skin. The result is lighter, less saturated color that may require more correction at your touch-up.
If you’re on a prescribed blood thinner (like warfarin or clopidogrel), check with your doctor before your appointment — this is a different situation and needs medical guidance.
If you have a headache the day before and need pain relief, Tylenol (acetaminophen) is a better choice than ibuprofen or aspirin.
No Alcohol
Worth calling out specifically: alcohol the night before or day of your appointment isn’t just a blood thinner issue. It also increases skin sensitivity and can cause additional bleeding. If you have a girls’ night or event the night before, just be aware that this can affect your experience and your results.
Finalize Your Reference Photos
If you have inspiration photos — brows you love, a shape you’ve been eyeing — send them to me before your appointment or bring them on your phone. Having references helps me understand your aesthetic preferences so I can design a brow that matches your vision, not just my default.
That said, your references are inspiration, not a template. What looks right on someone else’s face may not be right for yours. The mapping process is where I figure out what actually works for your specific bone structure and existing brow hair.
The Day of Your Appointment
Arrive with a Clean Face (No Brow Makeup)
No makeup on or near your brow area when you arrive. This means no brow pencil, no brow gel, no powder on or around the brows, and no concealer in that area.
You can have foundation, mascara, and other makeup elsewhere on your face — that’s completely fine. Just keep the brow area clean so I have an accurate baseline to work with.
If you normally fill in very sparse brows and feel self-conscious arriving without them, that’s okay. I’ve seen all kinds of natural brows in my studio. I work with what you have, not with what your makeup shows me.
Eat Before You Come In
This matters more than people think. Low blood sugar makes the microblading experience noticeably less comfortable. It can increase sensitivity, cause lightheadedness, and make the whole session harder to sit through.
Have a real meal a couple of hours before your appointment. Avoid anything that makes you jittery (very high caffeine) right before — not because caffeine causes serious issues, but because some people find it increases sensitivity.
Bring water or a snack if your appointment is long, especially if you’re a combo brows or full correction client.
Know Your Schedule for the Day After
You won’t want to be running errands or going to the gym right after your appointment. Plan for a relatively low-key rest of the day. Your brows will need to stay dry — no workouts, no pools, no heavy humidity.
If you want to know exactly what the day of the appointment looks like hour by hour, I walk through the entire experience in my microblading hour-by-hour guide.
Wear Comfortable Clothes
You’ll be lying back in the treatment chair for a couple of hours. Wear something you’re comfortable in. If you’re cold-natured, layer — my studio is comfortable, but some people prefer to have a jacket.
Set Up Your Healing Environment Before You Leave
This is practical, not overstated: set yourself up before you go. After the appointment, you’ll want to go straight home and keep your brows dry and undisturbed. Make sure you have:
- Clean pillowcases (swap to clean cotton before the appointment day)
- Aftercare ointment (I’ll send you home with what you need, but have it accessible)
- No plans for sweaty activities, swimming, or steam for the next 10-14 days
- A sun hat if you’ll be outdoors — direct UV exposure on fresh microblading speeds fading

What You Don’t Need to Do
Don’t Grow Your Brows Out
This is a myth I want to correct. You don’t need to stop grooming your brows for months before microblading. I work with whatever brow hair you have — more natural hair doesn’t necessarily mean better results. The shape I design is based on your bone structure, not just your existing hair.
Groom normally, just not the week immediately before.
Don’t Take Special Supplements or Vitamins
I sometimes see people try to take supplements to “prepare” their skin for microblading — biotin, collagen, etc. These don’t meaningfully affect your microblading results in a 2-week prep window. The things that matter are the avoidances listed above, not additions.
Don’t Research Too Much
I know this sounds strange from someone writing a preparation guide. But the internet has a lot of microblading horror stories, extreme before-and-after photos, and anxiety-inducing forums. If you’ve done your research, chosen an experienced artist with a solid portfolio, and you’re not on any contraindicated medications — you’re ready. Trust the process.
For a quick check to make sure you’re a good candidate, run through my microblading candidate checklist.
Quick Prep Checklist
Here’s the full list in one place:
| Timeframe | Action |
|---|---|
| 2 weeks out | Stop retinol, tretinoin, vitamin A serums |
| 2 weeks out | Stop AHA/BHA chemical exfoliants near brows |
| 2 weeks out | Schedule any Botox/fillers (do them before or wait until after) |
| 1 week out | No tanning beds or prolonged sun on brow area |
| 1 week out | Complete any brow waxing/threading |
| 48 hours out | No alcohol |
| 48 hours out | Stop aspirin, ibuprofen, fish oil, vitamin E |
| Day of | Arrive with clean face, no brow makeup |
| Day of | Eat a meal beforehand |
| Day of | Bring inspiration photos |
| Day of | Plan for a dry, relaxed rest of day |
After Your Appointment
The prep doesn’t end when you sit in my chair. Aftercare is equally important — and it continues for 10-14 days after your appointment.
For everything you need to know about what happens after, read my complete PMU aftercare guide. Use the Interactive Healing Timeline to track where you are day by day.
And if you have questions before or during your prep, reach out. I’d rather answer 10 prep questions than have someone come in having accidentally used retinol the night before.